Building Your Own Hardware Designs (FireSim Amazon FPGA Images)
This section will guide you through building an Amazon FPGA Image (AFI) image for a FireSim simulation.
Amazon S3 Setup
During the build process, the build system will need to upload a tar file to Amazon S3 in order to complete the build process using Amazon’s backend scripts (which convert the Vivado-generated tar into an AFI). The manager will create this bucket for you automatically.
Bucket names must be globally unique, so the default bucket name used by the manager
will be firesim-(YOUR_AWS_USERNAME)-(REGION). If the bucket name that the manager
tries to use is inaccessible to you (because someone else has taken the same name), the
manager will notice and complain when you tell it to build an AFI.
In the unlikely event that you need to change the bucket name from the aforementioned
default, you can edit the s3_bucket_name value in
deploy/bit-builder-recipes/f2.yaml and set append_userid_region to
false.
Build Recipes
In the deploy/config_build.yaml file, you will notice that the builds_to_run
section currently contains several lines, which indicates to the build system that you
want to run all of the listed builds in parallel, with the parameters for each listed in
the relevant section of the deploy/config_build_recipes.yaml file. In
deploy/config_build_recipes.yaml, you can set parameters of the simulated system.
To start out, let’s build a simple Chipyard target design,
firesim_rocket_quadcore_no_nic_l2_llc4mb_ddr3, which is the same design we used a
pre-built version of to run simulations in the earlier single-node simulation guide.
This is a design that has four cores, no nic, and uses the 4MB LLC + DDR3 memory model.
The build recipe of firesim_rocket_quadcore_no_nic_l2_llc4mb_ddr3 is located in
Chipyard at ${CY_DIR}/sims/firesim-staging/sample_config_build_recipes.yaml.
We will later change how the FireSim manager is called to reference this recipe.
To do so, delete (or comment out) all of the other build recipe names listed in the
builds_to_run section of deploy/config_build.yaml, besides the one we want. So,
you should end up with something like this (a line beginning with a # is a comment):
builds_to_run:
    # this section references builds defined in config_build_recipes.yaml
    # if you add a build here, it will be built when you run buildbitstream
    - firesim_rocket_quadcore_no_nic_l2_llc4mb_ddr3
Build Farm Instance Types
FireSim will run Vivado for each build on its own z1d.2xlarge instance. You can
change the instance type used by modifying the instance_type value in
deploy/build-farm-recipes/aws_ec2.yaml. From our experimentation, there
are diminishing returns using anything larger than a z1d.2xlarge. If you do wish to
use a different build instance type, keep in mind that Vivado will consume in excess of
32 GiB of DRAM for large designs.
Running a Build
Now, we can run a build like so (ensuring that we point to the build recipe given by Chipyard):
firesim buildbitstream -r ${CY_DIR}/sims/firesim-staging/sample_config_build_recipes.yaml
This will run through the entire build process, taking the Chisel (or Verilog) RTL and
producing an AFI/AGFI that runs on the FPGA. This whole process will usually take a few
hours. When the build completes, you will see a directory in deploy/results-build/,
named after your build parameter settings, that contains AGFI information (the
AGFI_INFO file) and all of the outputs of the Vivado build process (in the
cl_firesim subdirectory). Additionally, the manager will print out a path to a log
file that describes everything that happened, in-detail, during this run (this is a good
file to send us if you encounter problems). If you provided the manager with your email
address, you will also receive an email upon build completion, that should look
something like this:
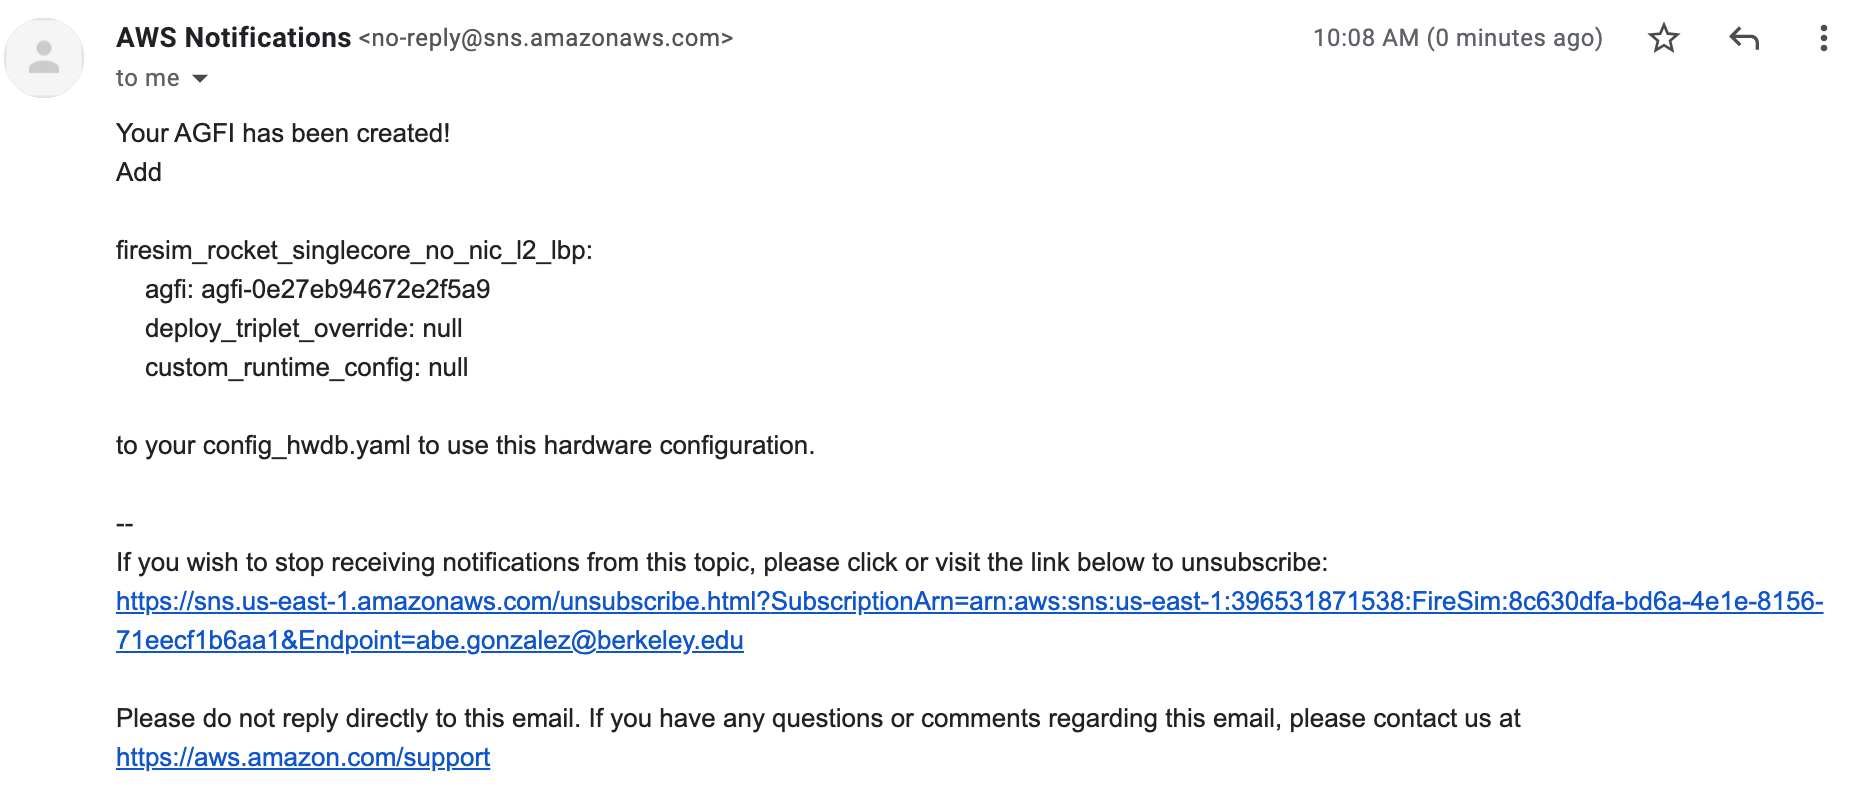
Build Completion Email
In addition to being included in the email, the manager will also print the entry that
can be added to config_hwdb.yaml so that the generated AGFI can be used to run
simulations. Note that on AWS, you will not have access to a physical bitstream
file. The final bitstream is stored in a backend managed by AWS and the only piece of
information we need to program the bitstream onto AWS F2 FPGAs is the value of the
agfi: key in the config_hwdb.yaml entry.
Now that you know how to generate your own FPGA image, you can modify the target-design to add your own features, then build a FireSim-compatible FPGA image automatically! To learn more advanced FireSim features, you can choose a link under the “Advanced Docs” section to the left.